Print this article Edit this article
Windows Printing: Department Code
Notes:
- Your department will need to provide the department code before you follow the instructions below.
In Windows 10:
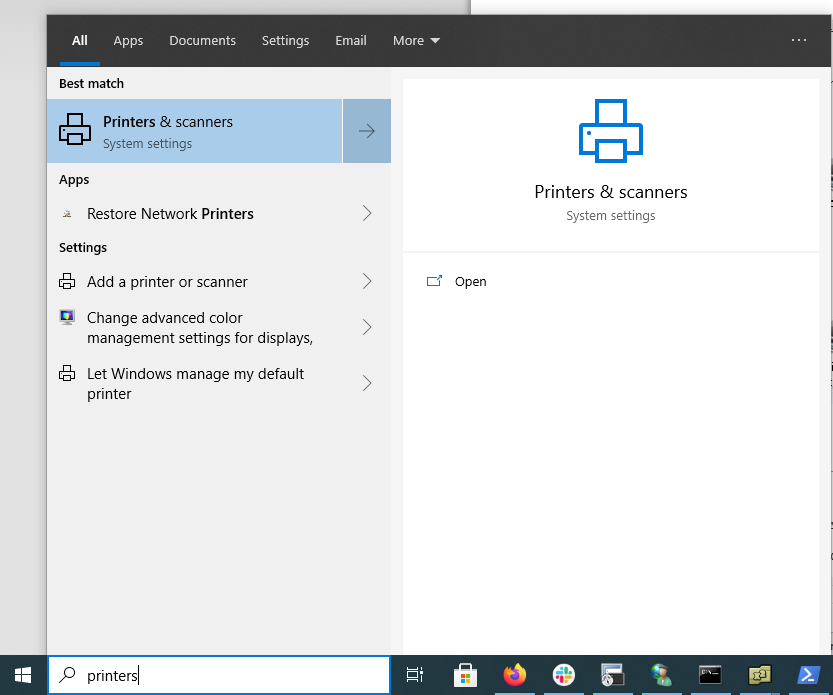
1) Press the Windows Key (Or open start menu) and type printers. Then Click printers & scanners
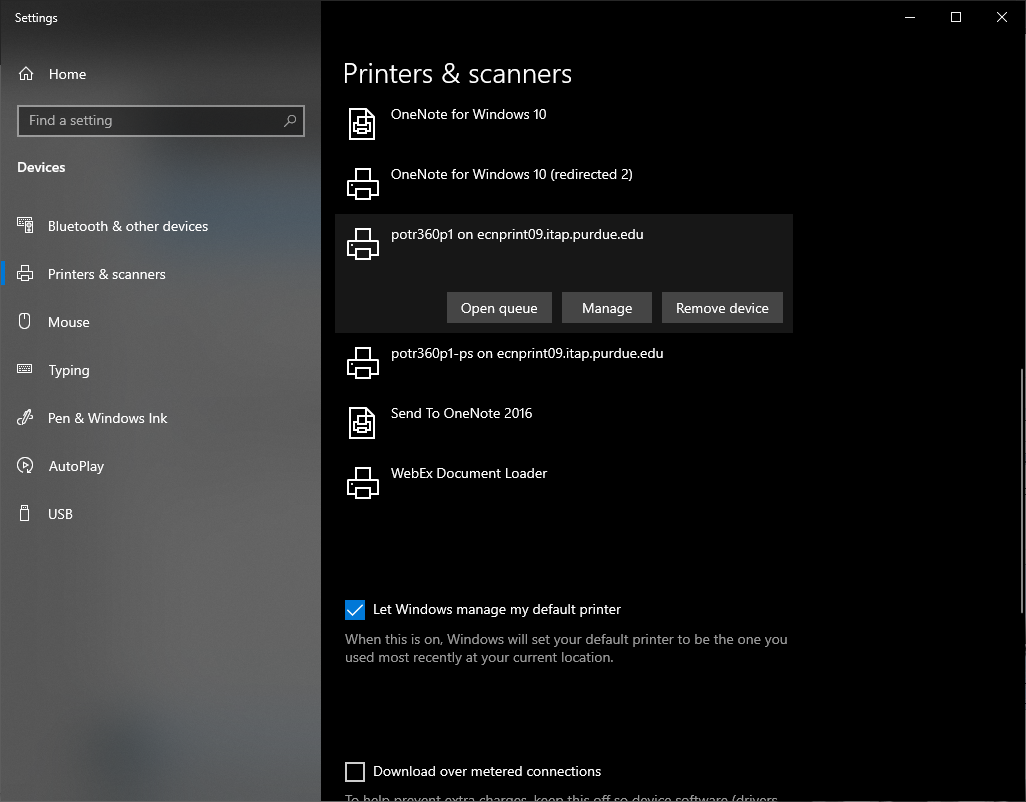
2) Click on the printer you want to edit, then click manage.
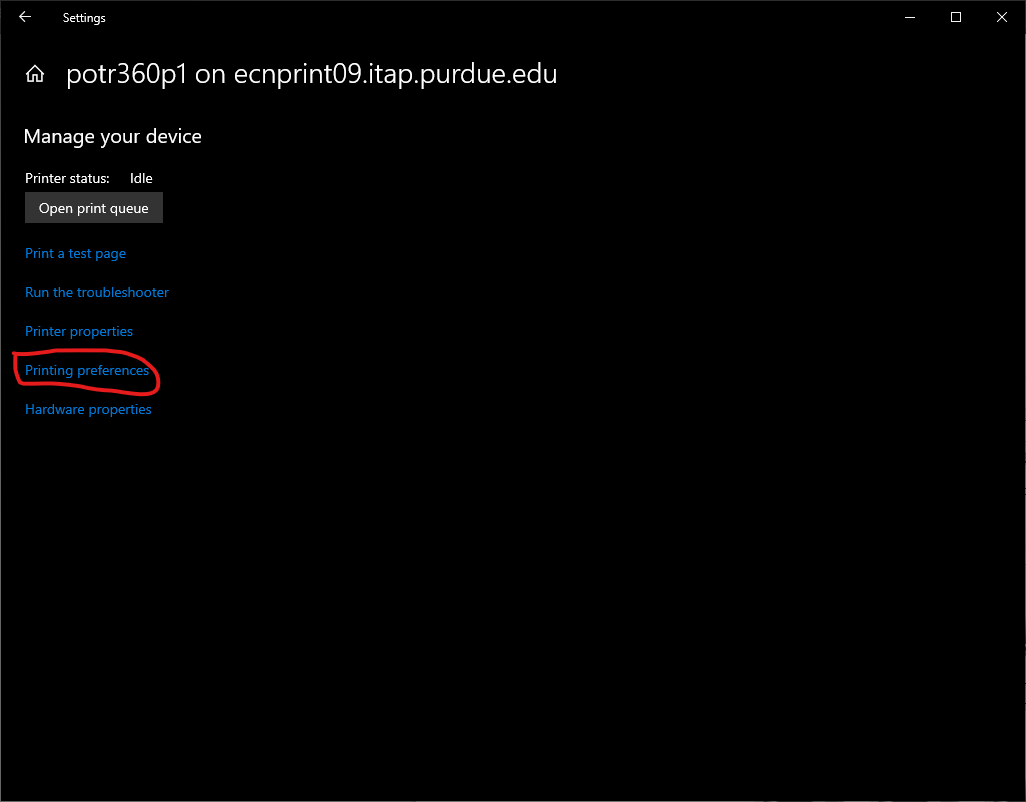
3) Click printing prefrences and follow instructions under the windows 7 section for your printer
In Windows 7:
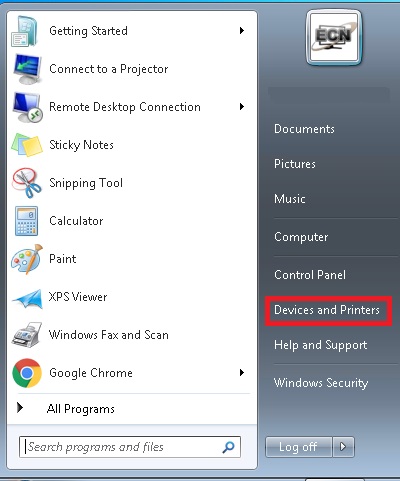
1) Go to Start Manu. Select Device and Printers to bring out the printers list on your local workstation.
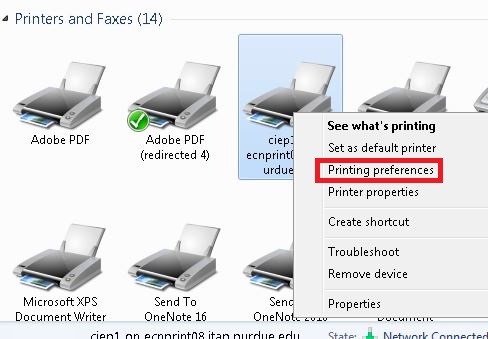
2) On the new window, Right Click on the printer you want to add the Department code. Then select "Printer Preferences"
Toshiba Printer
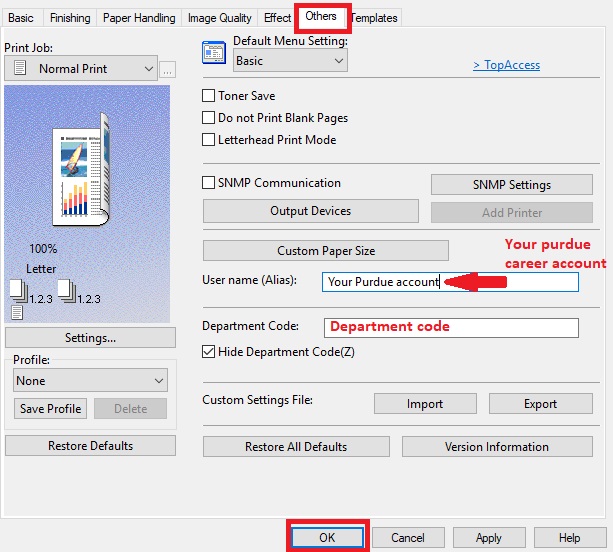
- Select "Other" tab. Enter your information as follow:
User name (Alias): (your Purdue career account)
Department Code: (provided by department)
- Click OK. You should now be all set.
Konica Minolta Printer
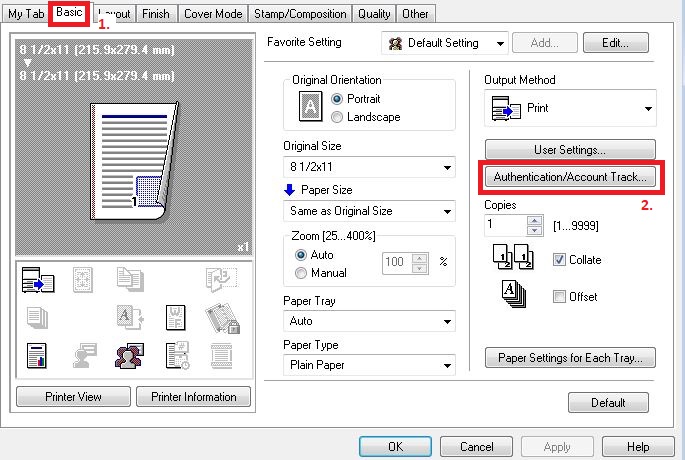
- Select "Basic" Tab. Then click on "Authentication/Account Track..."
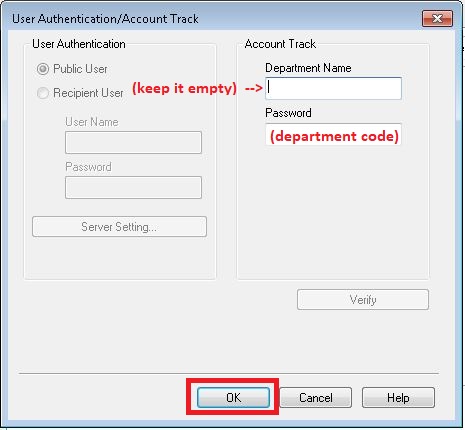
- On the new window, enter the information as follow:
Department Name: (Keep it empty)
Password: (Department Code)
- Click OK. Then another OK on the pervious page. You should be all set at this point.
Last Modified:
Jul 19, 2021 10:11 am America/New_York
Created:
Aug 7, 2017 2:34 pm GMT-4
by
admin
JumpURL: https://eng.purdue.edu/jump/20ac22b

